Our DIY Sprinkler Project
Automatic Sprinklers are an integral part of a modern landscape. They can be programmed to go off whenever and for how long you need without needing to remember to turn them on or off. Automatic sprinklers also tend to save you money as well. It is not only easy but also makes your lawn look green and beautiful. However, the initial setup and installation of an automated sprinkler system takes time and effort but as I experienced is well worth the sweat and time. I recently installed sprinklers to create this DIY Automated Sprinkler post. Please continue reading and follow me as I complete my Honey do list and my DIY Landscaping and fencing project.
- Measuring, Planning and Buying Supplies
When Installing a sprinkler system, it is important to determine where you will be needing them. In my opinion the position of each sprinkler head and location can be difficult to determine. Even though this is true there are many sprinkler stores near you that can help you determine the sprinkler head and where to put them based on your project. In order to get their help, you need to draw a fairly accurate drawing of your future watering area. So, first things first you will want to measure the length of every edge of the desired area that your sprinklers will be covering. I stuck to a graph paper, pencil, ruler and measuring wheel (tape measuring or pacing are good too) method. After Measuring each edge, I drew the layout of my yard and watering area on the grid paper where each square was equivalent to 1 ft. (you may need to adjust depending on how big your yard will be).
Once you have measured and drawn your yard you can take your drawing to the nearest sprinkler store where they will help you determine how many sprinkler heads, pipe, valves and zones you need to cover your desired area. I will leave this part to the experts. They generally will help you determine what you need to purchase and help you to create an order. If you would like to estimate the costs of your project please check download our free estimator here. You can then go ahead and order the parts you need from your local sprinkler store and have them deliver the materials to your home on the day that you schedule. I would have them deliver even though it may cost a delivery fee as most PVC pipe for sprinklers are 20 feet long and don’t fit very well in the back of most vehicles.
2. Starting the Installation: Digging Trenches
In a DIY sprinkler project, it can be difficult to know how you will be digging your trenches, where to put them and how deep. There are many options for digging your trenches. The 3 most common ways are a mini excavator, trencher and a shovel. I researched the costs and benefits of each based on 3 factors, Manual labor, Cost and time to complete.
- Shoveling by hand
As you guessed a shovel is much cheaper than the other 2 options. Generally, you can purchase a shovel for 20 to 50 dollars at your local hardware store. However, it requires a lot more manual labor and can take 20+ hours to dig each and every trench that is needed. If you have a clay like soil like mine you will not want to take this approach.
- Trencher
The next option is a trencher. You can rent a trencher for approximately 200 dollars and can be used to dig your trenches quickly. Unfortunately, they don’t clear the trenches very well of the loose dirt which requires you to still do a lot of manual shoveling to clean out the trenches. This method will most likely take you 8+ hours to prepare your trenches
- Mini Excavator
Unlike the other 2 options there is very little need to shovel and clear trenches manually. I chose this option and I spent maybe 15 or 20 minutes shoveling a few trenches that had collapsed inward. So for manual labor and time the mini excavator was able to dig all of our trenches in under 4 hours. This does cost slightly more money and may take some practice in order to get used to the tool but overall, only cost 300 dollars.
As a summary here are the comparisons in a side by side view.
| Tool | Cost | Manual Labor | Time needed |
| Shovel | $20 – $50 | High Amount | 20 + hours |
| Trencher | $200+ | Medium Amount | 10+ hours |
| Mini Excavator | $250- $300 | Low Amount | 3 – 4 hours |
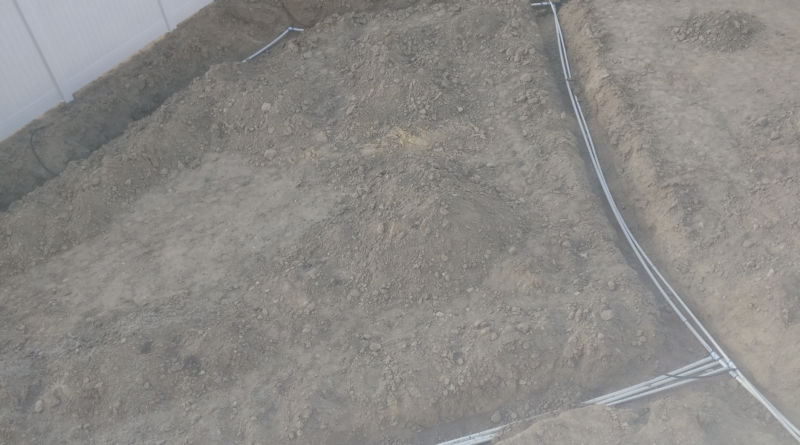
Once you have determined your tool you will need to start digging each trench. You will need to dig a trench that goes from your valve box to each and every sprinkler head location and make sure to connect all of the sprinkler heads per zone. Based on my experience I dug trenches around the perimeter of my entire yard area as most of my sprinklers went around the edge. In most cases you will only need to do this however you may need to dig a few trenches down the center of your yard based on the design you created earlier.
3. Laying Pipe with PVC and Funny Pipe
Now that you have your trenches you can start gluing your pipes. Always start by connecting your main line to your valve. Warning!! When cutting your main line don’t forget to turn of your irrigation or outdoor watering system. It is easier to select one zone and valve at a time and glue each zone separately. Do you have to glue all the pipes together? No, you don’t each valve must be a closed system and should not be connected to another valve or zone. So, you will need to glue all the pipes in one valve together. You will want to use hot blue cement and a lot of it. During the gluing process you want to coat the inside of each joint as well as the outside of the pipe that will go into the joint. You can never have too much blue glue.
4. Adding Sprinkler heads and Wiring your controller
You are now half way done but there is still a lot of work left to do. The next step will be connecting the valves to your control box. You will have purchased wiring from the store that either needs to be thread into your home or to a controller that can be mounted on the wall. Be sure to run this wire in one of your trenches to the desired location and wire the valves and connect them to the box. You may want to invest in a small jewelry screw driver to secure the wires. Once the wires are all connected you will begin burying the wiring and trenches leaving the funny pipe sticking out of the ground. After burying all of the trenches you will need to attach your sprinkler heads by digging a small trench to the location and making sure the sprinkler heads are an inch about the ground if you plan on adding sod later on. If you don’t plan on adding sod then place them to the height that will fit your design.
5. Testing, Adjusting and Automating
Now that you have filled in your trenches and added your sprinkler head it is time to test and adjust the radius and angle of each sprinkler. Beware you are likely to get very wet so don’t wear any close or outfits you consider expensive. Test each valve using the new control panel and then adjust the sprinklers to reach where you are expecting make sure they are not spraying into your window wells or onto your house or fence. After you have tested your system you can set the timer on your new control box.
Generally, after adding sprinklers you will be adding sod or spreading seed. We will be talking about Sod and finishing your lawn project as we finish my DIY landscaping and sprinkler projects. Follow us, Contact us and we will be happy to help you to finish your DIY projects or check out our landscapers at Our Honey Do list Network